A full VMware datastore can be unsettling—especially when the virtual machine contains a large disk, Snapshot Manager shows nothing, and ESXi reports that consolidation is needed.
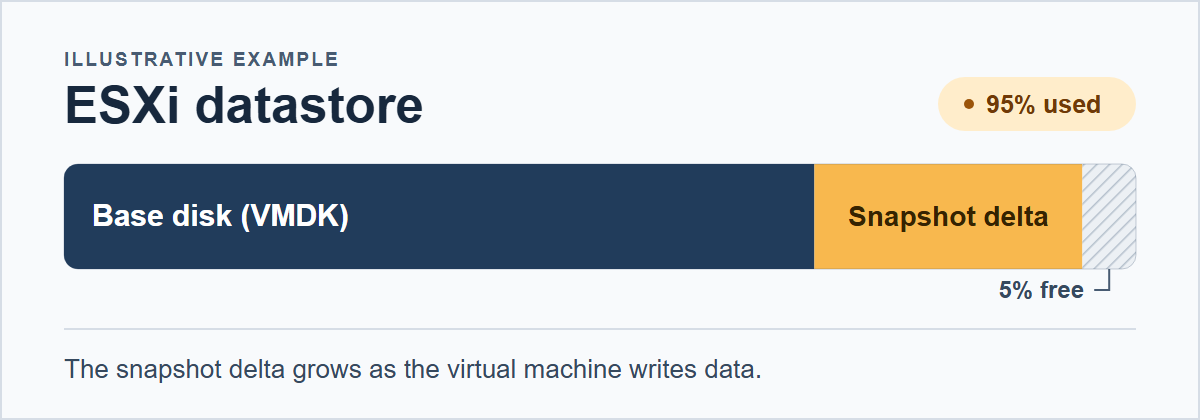
That was the situation in this recovery scenario. A thin-provisioned virtual disk and a large snapshot delta had consumed nearly all available datastore space. The VM’s current data depended on both files, but there was not enough free space on the datastore to safely proceed with consolidation as things stood.
The solution was to preserve the snapshot’s current state, relocate a verified copy of its delta to another datastore, and free enough space for VMware to consolidate the disk.
This article walks through the problem, the recovery approach, and the checks performed along the way.
Important: This article documents a specific recovery scenario, not a general-purpose snapshot repair procedure. Manual relocation and deletion of snapshot files are high-risk operations. If you do not have a verified backup, involve VMware support or an experienced VMware administrator before proceeding. A mistake can cause permanent data loss.
The Environment
For readability, the original environment names have been replaced with example server and datastore names:
| Component | Example name |
|---|---|
| ESXi host | esxi01 |
| Virtual machine | app-server01 |
| VM ID | 25 |
| Affected disk | app-server01-data01.vmdk |
| Base-disk datastore | prod-data01 |
| Recovery datastore | recovery-ssd01 |
| VM configuration datastore | vm-config01 |
All names, paths, disk addresses, and the VM ID in this article are examples. They must be verified and replaced with the values from your own environment. The examples do not suggest that you should rename existing VMDK files.
The Problem: A Full Datastore and an Unlisted Snapshot
The affected VM had a 5 TiB virtual disk composed of a thin-provisioned base disk and one SEsparse snapshot delta.
The files involved looked like this:
| File | Purpose |
|---|---|
app-server01-data01.vmdk | Base-disk descriptor |
app-server01-data01-flat.vmdk | Base-disk data |
app-server01-data01-000001.vmdk | Snapshot descriptor |
app-server01-data01-000001-sesparse.vmdk | Snapshot changes |
At the time of recovery:
- The base disk was using approximately 3.75 TiB.
- The snapshot delta was using approximately 1.70 TiB.
- The datastore had only about 5 MiB of free space.
- Snapshot Manager did not list any snapshots.
- ESXi reported consolidation needed.
- The VM was powered off.
The important distinction is that the snapshot delta was not merely an old file taking up space. It held changes that were part of the VM’s current disk state:
Current disk state = base disk + snapshot changesPointing the VM back to the base disk alone would have omitted those changes.
Why wasn’t the snapshot visible?
A snapshot can still be part of a virtual disk chain even when Snapshot Manager does not list it. The inventory view and the actual files backing a VM’s disk do not always tell the same story.
That is why the recovery began with the disk chain—not with deleting files.
Before You Begin
This example involved one base disk and one snapshot delta, with the VM powered off throughout the recovery.
Do not apply the relocation and deletion steps unchanged if the environment includes:
- Multiple snapshots or a longer snapshot chain.
- Linked clones.
- Shared disks.
- Multiple VMs that may depend on the same disk.
- A broken or inconsistent disk chain.
- Backup or replication software that may be using the files.
Those situations require additional dependency mapping and a recovery plan suited to the environment.
Whenever possible, start with a verified, restorable backup. The descriptor and configuration copies made in this article are useful recovery references, but they are not backups of the virtual disk’s actual data.
Version and support note: The manual relocation method described here is a recovery workaround, not routine VMware snapshot maintenance. Validate the approach and path format against your ESXi version and support guidance before attempting it.
Step 1: Keep the Virtual Machine Powered Off
Stop heavy write activity and perform a controlled shutdown if the VM is still running.
List the registered VMs and check the affected VM’s power state:
vim-cmd vmsvc/getallvms
vim-cmd vmsvc/power.getstate 25
In this case, the VM was already powered off:
Powered offKeep it powered off throughout the copy, attachment changes, deletion, and consolidation. Also prevent backup jobs, automation, or another administrator from starting it during the recovery.
Do not:
- Delete snapshot files simply because they appear old.
- Revert the snapshot to recover space.
- Point the VM at the base disk alone.
- Create another snapshot on the full datastore.
- Begin consolidation before assessing available space.
Step 2: Check Datastore Capacity and Identify the Disk Chain
Start by checking datastore capacity and filesystem mappings:
df -h
esxcli storage filesystem list
Identify the datastores that contain:
- The base disk and original snapshot.
- The VM configuration file.
- The proposed recovery location.
Free space on another datastore does not help the full datastore until data is actually relocated.
Inspect the disk descriptors
From the directory containing the affected disk:
cat app-server01-data01.vmdk
cat app-server01-data01-000001.vmdk
A base-disk descriptor may include entries such as:
CID=6adf0f2f
parentCID=ffffffff
ddb.thinProvisioned = "1"
The snapshot descriptor may include:
parentCID=6adf0f2f
parentFileNameHint="app-server01-data01.vmdk"
In this example, the snapshot’s parentCID matched the base disk’s CID.
Do not manually change CIDs to force a disk chain to open. A mismatch may indicate the wrong parent disk or a disk that has been modified.
Validate the chain
vmkfstools -e \
"/vmfs/volumes/prod-data01/app-server01/app-server01-data01-000001.vmdk"
The expected result is:
Disk chain is consistent.This checks the disk chain’s consistency. It does not verify every data block or the health of the guest filesystem.
Check snapshot inventory and consolidation status
vim-cmd vmsvc/snapshot.get 25
vim-cmd vmsvc/get.runtime 25 | grep -i consolidation
In this scenario, the snapshot inventory was empty, but runtime status showed:
consolidationNeeded = true,That combination is a reminder that an empty Snapshot Manager does not prove snapshot files are unused.
Confirm the active disk attachment
vim-cmd vmsvc/device.getdevices 25 | \
grep -B 8 -A 12 'app-server01-data01-000001.vmdk'
The affected disk was attached to the snapshot descriptor on prod-data01.
Step 3: Determine Whether Relocation Is Viable
The full datastore could not be expanded in this scenario. A second datastore, recovery-ssd01, had approximately 3.49 TiB free.
The delta’s logical file size was approximately 1.72 TiB, so there was enough estimated room to copy it to the second datastore. Logical size matters because an ordinary copy may not preserve all sparse-allocation savings.
Why move the delta?
During consolidation, snapshot changes are merged into the base disk. Because the base was thin-provisioned, its allocated space could grow during that process.
A rough estimate of remaining base growth was:
5 TiB capacity − 3.75 TiB allocated ≈ 1.25 TiBAfter copying the delta elsewhere and removing the verified redundant original, the original datastore was expected to regain approximately 1.70 TiB.
That appeared sufficient for the consolidation in this particular case.
This is an estimate, not a universal sizing formula. Snapshot count, disk layout, allocation behavior, metadata overhead, datastore activity, and VMware version-specific requirements can all affect space requirements. Verify the plan for your environment and maintain appropriate headroom.
If a supported alternative is available—such as expanding storage or restoring from a verified backup—consider that before manually relocating snapshot files.
Step 4: Set the Example Paths and Save Recovery Files
Define the paths for the source disk, recovery directory, and VM configuration:
SRC="/vmfs/volumes/prod-data01/app-server01"
DST="/vmfs/volumes/recovery-ssd01/app-server01-delta-recovery"
VMX="/vmfs/volumes/vm-config01/app-server01/app-server01.vmx"
Verify each path and datastore before running any commands. Datastore UUID paths may also be used after confirming their mapping.
SSH variables disappear when the session ends. Re-enter these assignments if you reconnect.
Create a new recovery directory and preserve copies of the configuration and descriptors:
mkdir "$DST" &&
cp -p "$VMX" "$DST/app-server01.vmx.before-recovery" &&
cp -p "$SRC/app-server01-data01.vmdk" \
  "$DST/app-server01-data01.vmdk.base-backup" &&
cp -p "$SRC/app-server01-data01-000001.vmdk" \
  "$DST/app-server01-data01-000001.vmdk"
If the recovery directory already exists, inspect it before continuing. Do not overwrite previous recovery files blindly.
Again, these copies preserve configuration and descriptors. They do not back up the base disk’s data.
Step 5: Copy the Snapshot Delta
Copy the snapshot data file to the recovery datastore:
cp "$SRC/app-server01-data01-000001-sesparse.vmdk" \
   "$DST/app-server01-data01-000001-sesparse.vmdk"
Depending on disk size and storage performance, this can take hours without displaying progress.
Copy the file first. Do not move or delete the original at this stage.
In this case, ordinary cp was used to copy the delta file itself. A vmkfstools -i operation would clone the combined disk state rather than simply copy this delta.
A closed SSH session may interrupt a foreground copy. Confirm the command completed successfully before continuing.
Step 6: Verify the Copy
Calculate and save a hash for the original:
md5sum "$SRC/app-server01-data01-000001-sesparse.vmdk" \
  > "$DST/source-delta.md5"
Then calculate one for the copy:
md5sum "$DST/app-server01-data01-000001-sesparse.vmdk" \
  > "$DST/copied-delta.md5"
Review both results:
cat "$DST/source-delta.md5" "$DST/copied-delta.md5"The hash values must match exactly. The filenames will be different.
MD5 is used here as a copy-integrity check, not as a security mechanism. Confirm that both commands completed successfully and produced valid results; the existence of an output file alone is not enough.
Step 7: Update the Copied Snapshot Descriptor
The original snapshot descriptor referenced its parent using a relative path:
parentFileNameHint="app-server01-data01.vmdk"After relocation, that relative path would look for the base disk in the recovery directory. The copied descriptor needed to point back to the base disk on prod-data01.
First, back up the copied descriptor:
cp -p "$DST/app-server01-data01-000001.vmdk" \
  "$DST/app-server01-data01-000001.vmdk.before-parent-edit"
Update the parent reference:
sed 's|^parentFileNameHint=.*|parentFileNameHint="/vmfs/volumes/prod-data01/app-server01/app-server01-data01.vmdk"|' \
  "$DST/app-server01-data01-000001.vmdk" \
  > "$DST/descriptor.tmp" &&
mv "$DST/descriptor.tmp" "$DST/app-server01-data01-000001.vmdk"
Inspect the descriptor and validate the relocated chain:
cat "$DST/app-server01-data01-000001.vmdk"
vmkfstools -e "$DST/app-server01-data01-000001.vmdk"
Expected result:
Disk chain is consistent.The CIDs and SEsparse extent reference should remain unchanged.
Stop if validation fails. Do not proceed to the attachment change or deletion.
Step 8: Update the VM’s Disk Attachment
Back up the current VMX file:
cp -p "$VMX" "$DST/app-server01.vmx.before-attachment-edit"Confirm the existing disk attachment:
grep '^scsi0:1\.fileName' "$VMX"In this example, the affected disk was attached at scsi0:1. Do not assume that address is correct for another VM.
Update only the verified attachment:
sed 's|^scsi0:1\.fileName = .*|scsi0:1.fileName = "/vmfs/volumes/recovery-ssd01/app-server01-delta-recovery/app-server01-data01-000001.vmdk"|' \
  "$VMX" > "$DST/app-server01.vmx.updated" &&
cp "$DST/app-server01.vmx.updated" "$VMX"
Reload the VM configuration:
vim-cmd vmsvc/reload 25If the edit or reload fails, stop and investigate before continuing. In particular, check whether the datastore holding the VMX has sufficient free space for the update.
Step 9: Verify the Loaded Configuration
Editing the VMX file is not enough by itself. Confirm what ESXi actually loaded:
vim-cmd vmsvc/device.getdevices 25 | \
grep -B 8 -A 12 'app-server01-data01-000001.vmdk'
The active snapshot should reference the recovery datastore:
fileName = "[recovery-ssd01] app-server01-delta-recovery/app-server01-data01-000001.vmdk"The parent should reference the base disk:
fileName = "[prod-data01] app-server01/app-server01-data01.vmdk"Check the power state and relocated chain again:
vim-cmd vmsvc/power.getstate 25
vmkfstools -e "$DST/app-server01-data01-000001.vmdk"
Checkpoint before deletion
Every item below must be confirmed:
- The VM is powered off.
- The original and copied delta hashes match.
- The relocated disk chain is consistent.
- ESXi loaded the snapshot attachment from
recovery-ssd01. - The parent points to the correct base disk on
prod-data01. - No other VM or process depends on the original delta.
Step 10: Remove the Redundant Original Delta
Destructive step: In this recovery, the original delta was deleted only after its copy and active attachment were verified. This is not a general instruction to delete snapshot files. Without a verified backup, an error at this point can cause permanent data loss.
Use the explicit source path:
rm -i /vmfs/volumes/prod-data01/app-server01/app-server01-data01-000001-sesparse.vmdkRead the prompt carefully. Confirm it names the original file on prod-data01 before answering y.
Do not delete:
app-server01-data01-flat.vmdk- The base-disk descriptor
- The copied delta on
recovery-ssd01 - The VM’s entire directory
Do not use wildcards.
Check the recovered space and validate the active chain:
df -h /vmfs/volumes/prod-data01
vmkfstools -e "$DST/app-server01-data01-000001.vmdk"
In this case, approximately 1.70 TiB was recovered, and the active chain remained consistent.
Step 11: Consolidate the Disk Through VMware
With the VM still powered off:
- Select app-server01 in the ESXi or vSphere interface.
- Choose Snapshots → Consolidate.
- Confirm the operation.
- Monitor Recent Tasks until it completes.
Menu placement varies by VMware version.
Do not choose Revert, and do not create another snapshot. Do not reboot the host or interrupt consolidation merely because it is taking a long time.
If consolidation fails, preserve the remaining files and investigate the exact error.
Once consolidation begins, the base disk is being modified. The old VMX and descriptor backups are not a guaranteed rollback.
Step 12: Verify the Recovery
Check the consolidation status:
vim-cmd vmsvc/get.runtime 25 | grep -i consolidationExpected:
consolidationNeeded = false,Inspect the active disk attachment:
vim-cmd vmsvc/device.getdevices 25 | \
grep -B 8 -A 12 'app-server01-data01'
In this example, the disk should now reference the base descriptor:
[prod-data01] app-server01/app-server01-data01.vmdkAfter confirming that the Consolidate task completed, boot the VM and check the guest:
df -h
lsblk -f
sudo journalctl -k -b -p warning --no-pager
Verify that:
- The expected volume is mounted.
- Important files are readable.
- Applications and services are functioning.
- There are no relevant disk or filesystem errors.
Do not run repair-mode filesystem checks on mounted filesystems.
Only clean up leftover recovery files after confirming that they are no longer referenced. Do not restore the old snapshot-backed VMX after successful consolidation.
How to Prevent This Situation
A few monitoring and maintenance practices can reduce the chance of another emergency:
- Maintain tested backups. Store irreplaceable data separately and periodically verify that it can be restored.
- Monitor datastore free space. Guest filesystem free space does not tell you how much room remains on the VMware datastore.
- Alert on consolidation status. Investigate VMs reporting that consolidation is needed.
- Monitor snapshot age and size. Large, long-lived snapshots deserve attention.
- Review backup cleanup. Confirm that backup jobs remove or consolidate their snapshots successfully.
- Plan for thin provisioning. A thin base disk and its snapshots can consume more physical datastore space together than the disk’s nominal capacity.
Final Thoughts
The critical part of this recovery was recognizing that the snapshot contained active data. The goal was not to throw it away; it was to preserve it while creating enough room for VMware to merge it safely.
The recovery sequence was:
Power off → map the chain → copy the delta → verify the copy → update the parent path → change and verify the attachment → remove only the verified duplicate original → consolidate → validate the guest → back up.
A full datastore does not automatically mean the data is lost. But when snapshots are involved, the file that looks like the easiest space to reclaim may contain the newest version of that data.